Few kitchen tools are as essential as the whisk, a simple yet ingenious device that transforms ingredients with air and motion. From fluffy scrambled eggs to perfectly emulsified vinaigrettes and cloud-like whipped cream, a good whisk is a chef’s best friend. Yet, this indispensable tool often falls victim to a silent adversary: improper drying. Hidden moisture can lead to unsightly rust, unsanitary mold, and a shortened lifespan for your beloved whisk. Understanding how to properly dry your whisk isn’t just about maintaining its appearance; it’s crucial for hygiene, performance, and durability. Let’s delve into the art and science of whisk drying to ensure your kitchen companion remains in pristine condition, free from the pitfalls of lingering dampness.
The Unseen Dangers of Improper Whisk Drying
At first glance, a whisk seems straightforward, but its intricate design of intertwined wires or bristles creates numerous nooks and crannies where water can become trapped. These “water traps” are the root cause of many whisk woes. When moisture persists in these confined spaces, especially at the juncture where wires meet the handle, it creates an ideal environment for harmful elements to thrive.
For whisks made of stainless steel or other metals, trapped water leads directly to rust. This not only degrades the aesthetic appeal of your whisk but can also leach metallic flavors into your food and pose a health risk if rust particles flake off. Beyond the visible wires, metal handles, particularly those with hollow interiors or unsealed seams, are notorious for collecting water, which can then fester and cause internal corrosion that eventually weakens the entire structure.
Meanwhile, whisks made from natural materials like bamboo, commonly used for matcha, are highly susceptible to mold growth. Bamboo’s porous nature means it absorbs water readily, and if not dried thoroughly and quickly, it can become a breeding ground for mildew, leading to unpleasant odors and rendering the whisk unhygienic for food preparation. Even silicone whisks, while rust-proof, can harbor moisture within their core or handle, potentially leading to bacterial growth or an unpleasant damp smell if not dried correctly.
Ignoring these drying imperatives not only shortens your whisk’s lifespan but also compromises kitchen hygiene. A properly dried whisk is a clean, safe, and efficient tool, ready for its next culinary adventure.
Essential Steps for Initial Whisk Preparation After Washing
The journey to a perfectly dry whisk begins immediately after washing. These initial steps are crucial for removing the bulk of the water and food residues, setting the stage for thorough drying.
Immediate Rinsing and Residual Food Removal
|
Our Picks for the Best Whisk in 2026
As an Amazon Associate I earn from qualifying purchases.
|
||
| Num | Product | Action |
|---|---|---|
| 1 | OXO SteeL 9-Inch Whisk |

|
| 2 | OXO Good Grips Mini Whisk |
|
| 3 | Walfos Silicone Whisk,Stainless Steel Wire Whisk Set of 3 -Heat Resistant 480°F Kitchen Whisks for Non-stick Cookware,Balloon Egg Beater Perfect for Blending,Whisking,Beating,Frothing & Stirring,Black |
|
| 4 | OXO Good Grips 11-Inch Balloon Whisk |
|
| 5 | TEEVEA Danish Dough Whisk Stainless Steel Wooden Handle for Sourdough Pizza Bread Baking |
|
| 6 | NileHome Stainless Steel Whisk Set 8" 10" 12" Kitchen Whisk Balloon Whisk Kitchen Wisk Wire Whisks for Cooking, Whisking, Blending, Beating, Stirring-3 Pack… |
|
| 7 | Whisks for Cooking, 3 Pack Stainless Steel Whisk for Blending, Whisking, Beating and Stirring, Enhanced Version Balloon Wire Whisk Set, 8"+10"+12" |
|
| 8 | KitchenAid Classic Utility Whisk, 10.5 Inch, Black |
|
| 9 | NileHome Silicone Whisk Set 8" 10" Kitchen Whisk Kitchen Wisk Wire Whisks for Cooking, Whisking, Blending, Beating, Stirring-Black |
|
| 10 | Amazon Basics Stainless Steel Wire Whisk Set for Cooking, Different Sizes, Easy to Hold Ergonomic Handle, 3 Piece, Black/Silver |
|
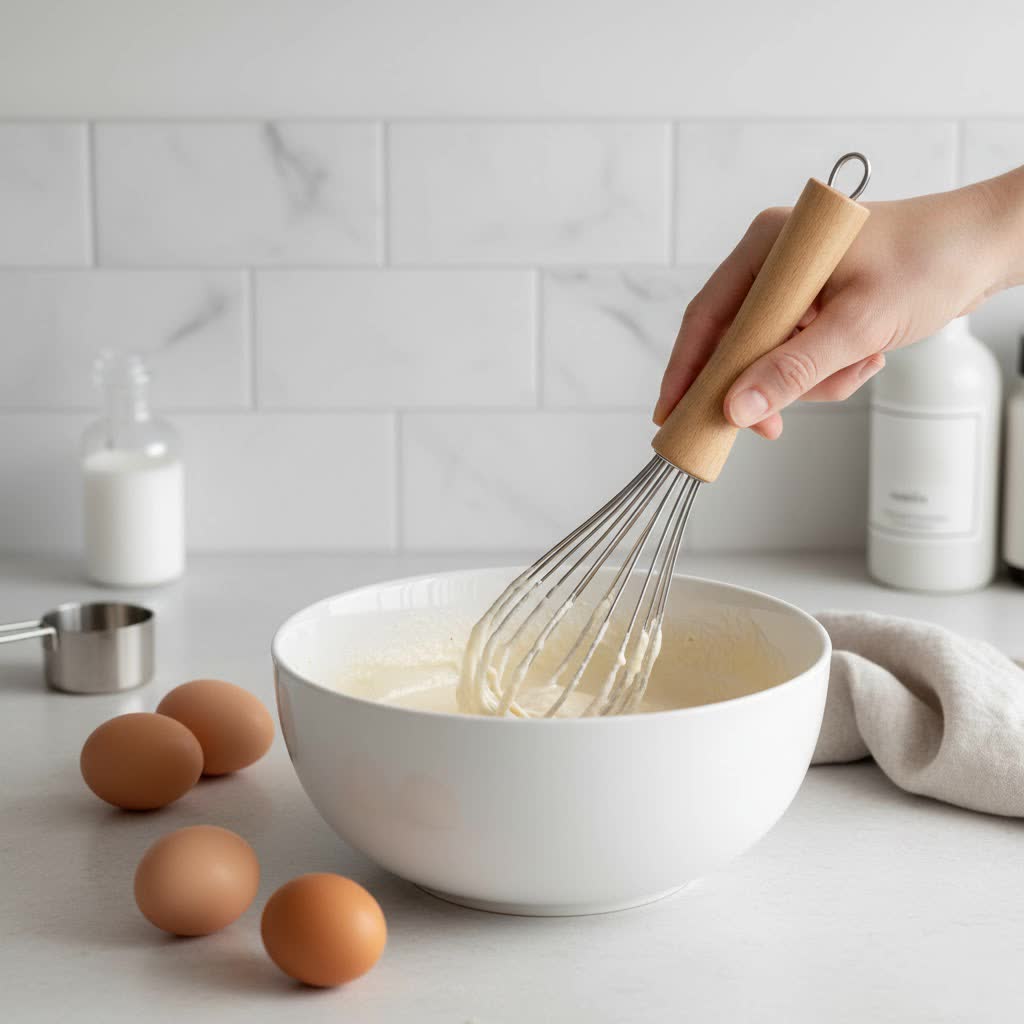
As soon as you’re done whisking, rinse your whisk under warm running water. This immediate action is vital for preventing food particles from drying and hardening onto the wires, which makes subsequent cleaning much more challenging. Pay close attention to the base where the wires meet the handle, as this area is a magnet for batter, sauces, or egg residue. For stubborn bits, vigorously whisking in a bowl of warm, soapy water can effectively dislodge trapped food particles. This technique uses the whisk’s own motion to clean itself, ensuring all surfaces are scrubbed clean.
The Power of a Good Shake: Expelling Excess Water
Once rinsed, give your whisk several firm, downward shakes over the sink. This simple yet effective action uses centrifugal force to expel a significant amount of water clinging to the wires and within the handle. You’ll be surprised how much water can be removed this way, drastically reducing the subsequent drying time and minimizing the chances of water pooling in hidden spots. A vigorous shake can often dislodge droplets from even the tightest coils, preventing them from becoming stagnant moisture traps.
Thorough Towel Drying: Your First Line of Defense
After shaking, use a clean, absorbent kitchen towel to meticulously dry every accessible part of your whisk. Gently press the towel between the wires, working your way from the tips up to the handle. Don’t overlook the handle itself, especially if it’s made of metal or has a hollow construction; water often seeps into these areas. For whisks with silicone coatings, towel drying is particularly effective as water tends to bead on the non-stick surface, making it easier to wipe away. This hands-on approach ensures that surface moisture is eliminated, preventing water spots and providing a head start on air drying.
Advanced Drying Techniques to Eliminate Hidden Moisture
While initial towel drying removes visible water, hidden moisture within the whisk’s structure remains the primary concern. Employing advanced techniques ensures thorough evaporation and prevents persistent dampness.
The Upside-Down Approach: Maximizing Drainage
One of the most effective strategies for whisk drying is to store it upside down. This means placing the whisk with its handle pointing upwards, allowing the wires to hang downwards. Gravity becomes your ally, encouraging any residual water within the handle or at the wire-to-handle connection point to drip out naturally. This method is particularly beneficial for whisks with hollow metal handles or those where the wires are securely fastened inside the handle, preventing stagnant water accumulation. You can place the handle in a cup or a utensil crock to keep it stable, ensuring maximum airflow around the wires.
Utilizing Whisk Stands and Drying Racks for Airflow
For certain whisk types, especially delicate bamboo matcha whisks, specialized drying stands (chasentate) are invaluable. These stands are designed to cradle the whisk’s bristles, maintaining their shape while allowing optimal air circulation around each tine. While primarily for matcha whisks, the principle of elevated, open-air drying applies to all whisks. For standard kitchen whisks, a dish drying rack can serve a similar purpose. Position the whisk so that its wires are not touching other items and air can flow freely around all parts. Proper elevation and separation are key to preventing damp spots and accelerating the drying process.
Harnessing Air Circulation (Open Spaces, Sunlight, Fan)
Air is a whisk’s best friend during drying. After the initial steps, place your whisk in an open, well-ventilated area. A kitchen counter away from direct splashing, a window sill with sunlight, or even near a gentle fan can significantly speed up evaporation. Sunlight not only aids drying but can also have a mild sanitizing effect. Avoid tucking a damp whisk into a drawer or cabinet immediately after washing, as this traps moisture and creates a breeding ground for mold and rust. Ensure the area allows for air to circulate freely around all the whisk’s components.
When to Consider a Hairdryer (Specific Situations)
While not an everyday solution, a hairdryer can be a powerful tool for rapidly drying whisks in specific situations. This method is especially useful for whisks with intricate designs, deep crevices, or hollow handles that are notoriously difficult to dry manually. Use a low-heat setting and direct the airflow evenly over the wires and particularly the handle connection points. This quickly evaporates residual moisture, providing an extra layer of assurance against water traps. It’s an excellent option when you need your whisk ready for immediate use or for ensuring absolute dryness before long-term storage, though it should be used judiciously to avoid overheating any plastic components.
Common Whisk Types and Their Unique Drying Needs
While general drying principles apply, different whisk materials and designs have specific considerations for preventing water traps and damage.
Stainless Steel Whisks: Focus on Joints and Handles
Stainless steel whisks are kitchen workhorses, prized for their durability and resistance to rust. However, they are not entirely immune. The weakest points are often the joints where the individual wires are gathered and sealed into the handle. Water can seep into these tiny gaps, leading to internal rust that might not be immediately visible but can weaken the structure over time. Hollow metal handles are another common culprit for trapping water. For these whisks, after a thorough towel dry, hanging them upside down or placing them in a utensil crock with the handle facing up is crucial to allow any trapped water to drain. Avoiding the dishwasher for whisks with unsealed handles can also significantly prolong their life, as dishwashers can force water into these hidden areas.
Silicone Whisks: Simpler Drying, Still Essential
Silicone whisks offer a distinct advantage: they don’t rust. Their non-porous, flexible wires are gentler on non-stick cookware and often easier to clean. While less prone to moisture-related damage, proper drying is still essential to prevent bacterial growth and unpleasant odors. Water can still get trapped inside the handle if it’s hollow or poorly sealed. After washing, a good shake and thorough towel dry are usually sufficient. They can then be air-dried in any orientation, though hanging them allows for optimal air circulation around the handle and base. Since silicone doesn’t absorb water, quick evaporation is generally achievable.
Bamboo Whisks (Chasen): Porosity and Specialized Care
Bamboo whisks, or chasen, are delicate tools used specifically for whisking matcha tea. Their porous, natural material makes them highly susceptible to mold if not dried meticulously. After each use, rinse the chasen thoroughly with warm water, gently swishing it in a bowl of clean water to remove all tea residue. A vigorous shake to remove excess water is important. The most recommended drying method is to place the chasen on a specific ceramic whisk holder, called a “chasentate” or “kusenaoshi.” This stand not only maintains the whisk’s delicate shape by allowing its tines to splay out naturally but also ensures maximum air exposure to every single bristle, promoting rapid and complete drying. If a stand isn’t available, placing the whisk upside down (bristles up, handle down) in an open area can work, but avoid storing it in its original plastic casing, which traps moisture and encourages mold.
Avoiding Common Drying Mistakes That Lead to Damage
Even with the best intentions, certain drying practices can inadvertently lead to whisk damage. Being aware of these common mistakes is crucial for extending your whisk’s life and maintaining its hygiene.
| Common Whisk Drying Mistake | Consequence | How to Avoid It |
|---|---|---|
| Leaving Whisk Horizontally to Drip | Water pools at the base of the wires or inside the handle, leading to rust, mold, or mineral deposits. | Always dry your whisk vertically – either hanging it, standing it upside down in a cup/crock, or using a whisk stand. This allows gravity to assist drainage and promotes airflow around all parts. |
| Ignoring the Handle Interior | Hollow or poorly sealed handles become unseen reservoirs for water, leading to internal rust, unpleasant odors, and a weakened structure. | After washing, vigorously shake the whisk to force water out of the handle. For stubborn cases, a hairdryer on a low setting can help evaporate trapped moisture. Ensure handles are fully dry before storage. |
| Premature Storage in Enclosed Spaces | Putting a damp whisk into a drawer or utensil caddy before it’s completely dry creates a humid, airtight environment perfect for rust and mold. | Always allow whisks to air dry completely in a well-ventilated area. Only store them in drawers or enclosed spaces once you are certain every part, especially the handle, is bone dry. |
| Dishwasher Drying Pitfalls | High heat can damage plastic/silicone components, and water can be forced into unsealed handles, causing hidden rust. Some whisks are not dishwasher safe. | Check manufacturer guidelines. For whisks with wooden or unsealed metal handles, hand washing and air drying are always safer. If using a dishwasher, ensure it has a good drying cycle and still follow up with manual checks. |
Whisk Longevity: Proper Storage After Drying
Once your whisk is immaculately clean and completely dry, proper storage is the final step to ensure its longevity and readiness for future use. The goal is to maintain a dry, well-ventilated environment that protects the whisk from moisture and physical damage.
Hanging vs. Drawer Storage
The best way to store a whisk often depends on its design and your kitchen space. Hanging whisks from a utensil rack or a pegboard is ideal. This method promotes continued air circulation, further preventing any residual moisture issues, and keeps the whisk’s wires from getting bent or tangled with other utensils. It also offers easy access and a clear visual inventory of your tools.
If drawer storage is your only option, ensure the whisk is completely dry before placing it inside. Avoid cramming it into a crowded drawer where wires can bend or become damaged. Consider using drawer organizers or even a simple rubber band around the wires to keep them contained and prevent tangling with other tools. This helps maintain the whisk’s shape and prevents the frustration of jammed drawers.
Maintaining a Dry Environment
Regardless of how you store them, the overarching principle is to maintain a dry environment. Avoid storing whisks near the sink where they might be exposed to splashes, or in overly humid areas of the kitchen. For bamboo whisks, never return them to their original packaging, as this traps moisture. A dedicated whisk stand (for matcha whisks) or simply an open area on the counter until fully dry are preferable. Regularly check your stored whisks, especially those infrequently used, for any signs of dampness, rust, or mold. Proactive maintenance ensures your whisks remain in prime condition, ready to tackle any culinary challenge without compromise.
Expert Insights on Whisk Care
“Many home cooks underestimate the importance of whisk drying. It’s not just about avoiding rust; it’s about preventing bacterial growth within those unseen crevices. A dry whisk is a safe whisk.” – Chef Anya Sharma, Culinary Instructor and Kitchenware Expert
Conclusion
The humble whisk, a cornerstone of countless culinary creations, truly shines when it’s meticulously cared for. The battle against water traps, rust, and mold is won not by expensive treatments, but by a consistent commitment to proper drying. From the initial vigorous shake to the final air-drying position, each step plays a crucial role in safeguarding its integrity and hygiene. By understanding the unique needs of different whisk materials and consciously avoiding common drying pitfalls, you extend the lifespan of your tools, ensure food safety, and maintain peak performance. Embrace these practices, and your whisk will remain a trusted, sparkling clean companion, ready to whip up magic in your kitchen for years to come. What drying hacks have you discovered that keep your whisks in perfect shape?
Frequently Asked Questions
Can you put all whisks in the dishwasher?
No, not all whisks are dishwasher safe. Whisks with wooden handles, unsealed metal handles, or delicate bamboo bristles should generally be hand washed and air dried to prevent damage, rust, or mold. Always check the manufacturer’s care instructions.
How do I dry a whisk handle that collects water?
For handles that trap water, vigorously shake the whisk immediately after washing to force out as much moisture as possible. Then, store it upside down in a cup or utensil holder, allowing gravity to drain any remaining water. A hairdryer on a low setting can also be used for quick, thorough drying.
Why does my whisk smell damp or musty?
A damp or musty smell usually indicates the presence of mold or bacterial growth due to trapped moisture. This is common in porous materials like bamboo or in unsealed hollow handles where water stagnates. Ensure your whisk is completely dry and aired out after every wash.
How can I prevent rust on my metal whisk?
To prevent rust on a metal whisk, always wash it promptly after use, dry it thoroughly with a towel, and then air dry it completely in a well-ventilated area, preferably upside down. Avoid leaving it to soak for extended periods or storing it in damp, enclosed spaces.
Is it better to hang whisks or store them in a drawer?
Hanging whisks is generally preferred as it allows for optimal air circulation, preventing moisture buildup and keeping wires from bending. If storing in a drawer, ensure the whisk is completely dry, and consider using a drawer organizer or a rubber band to keep wires contained.
How often should I replace my whisk?
The lifespan of a whisk depends on its material, frequency of use, and care. Metal whisks can last many years with proper maintenance. Bamboo whisks typically need replacement every 6-12 months as their bristles wear down or if mold appears. Replace any whisk showing significant rust, mold, or structural damage.