Do you crave that delightful, creamy milk foam atop your morning coffee or a cozy hot chocolate, but lack a fancy espresso machine? You’re not alone. Many home baristas seek simple yet effective ways to elevate their beverages. While specialized gadgets often steal the spotlight, the humble spring coil whisk, with its unique design, offers a surprisingly effective method for achieving satisfying milk froth right in your own kitchen. This guide will walk you through everything you need to know, from understanding your whisk to perfecting your frothing technique, ensuring you can enjoy café-quality drinks with minimal fuss.
Understanding Your Spring Coil Whisk
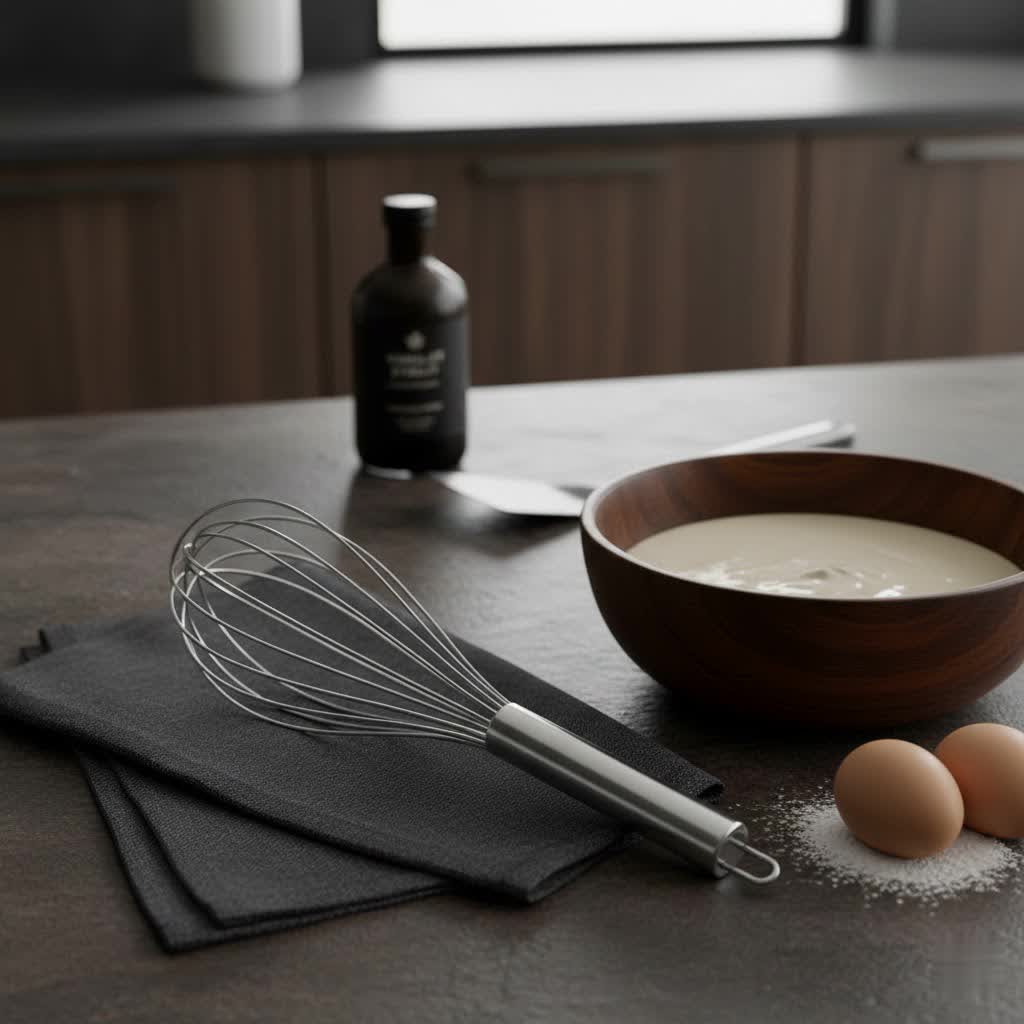
A spring coil whisk, sometimes referred to as a spiral or coil whisk, is distinct from traditional balloon or French whisks. Instead of multiple wires forming a cage, it features a single wire coiled into a tight spring at its head. This design is specifically engineered for efficient mixing in compact spaces like mugs, glasses, or small saucepans. Unlike other whisks that rely on side-to-side or circular motions, the spring coil whisk excels with an up-and-down pumping action, allowing its coiled head to agitate liquids effectively, even in tight quarters.
While exceptionally good for blending sauces, mixing drinks, or whisking small quantities of eggs, its primary limitation when it comes to milk frothing is its capacity for aeration. It is not designed to incorporate a large volume of air rapidly, which is essential for creating delicate, voluminous microfoam. Therefore, the foam produced by a spring coil whisk tends to have larger bubbles and a less refined texture compared to what you might achieve with an electric frother or a steam wand. However, for a simple, homemade froth that adds a pleasant creaminess to your beverage, it remains a fantastic, accessible tool.
Preparing for Perfect Milk Froth
Achieving delicious frothed milk, even with a basic spring coil whisk, begins with proper preparation. The type of milk you choose and its temperature play crucial roles in the final texture and volume of your foam.
Choosing the Right Milk
The fat and protein content of milk directly impacts its frothing capabilities.
- Whole Milk: Often considered the gold standard, whole milk (around 3.25% fat) produces a rich, creamy, and stable foam, ideal for lattes and cappuccinos. Its fat content contributes to a velvety microfoam.
- 2% Milk: A good alternative, 2% milk still froths well, offering a slightly lighter texture while maintaining decent microfoam stability.
- Skim Milk: Produces the largest volume and the airiest foam due to its higher protein content and lack of fat. However, this foam can be less creamy and may dissipate more quickly.
- Plant-Based Milks: Not all plant-based milks froth equally. Barista editions of oat, almond, or soy milk are specifically formulated to create a smoother, more stable foam. Oat milk, in particular, is often praised for its frothing ability.
Starting with cold milk is often recommended, as it gives you more time to work with the frothing process before the milk gets too hot.
Ideal Milk Temperature
Temperature is paramount for successful frothing. Overheated milk can scald, losing its natural sweetness and ability to hold foam. Underheated milk won’t produce enough volume. The sweet spot for frothing milk is typically between 140°F and 155°F (60°C to 68°C). This temperature range is hot enough to develop sweetness and create stable foam without boiling the milk. Using a food thermometer can be helpful, especially when you’re first learning, but with practice, you’ll develop a feel for the right temperature.
Selecting the Right Container
When frothing milk, remember that its volume will roughly double. Therefore, choose a mug or small saucepan that is at least twice the volume of the milk you plan to froth. Filling your container no more than halfway will provide ample space for the milk to expand and allow for effective agitation without splashing.
Step-by-Step Guide: Frothing Milk with a Spring Coil Whisk
Ready to create some delightful foam? Follow these steps for frothing milk using your spring coil whisk:
Step 1: Heat Your Milk
Pour the desired amount of milk into a small saucepan or microwave-safe mug. Heat it gently on the stove over medium heat or in the microwave until it reaches the ideal temperature of 140°F to 155°F (60°C to 68°C). Avoid boiling the milk. If using a microwave, heat in short bursts, stirring occasionally.
Step 2: Pour into a Frothing Vessel
Once heated, pour the milk into a cup or mug suitable for frothing. Ensure there’s enough headspace for the milk to double in volume.
Step 3: Position the Whisk
Submerge the coiled head of your spring whisk just below the surface of the milk. The goal is to introduce air without splattering. Keep your wrist relaxed, holding the whisk comfortably.
Step 4: Begin Whisking
Start moving the whisk vigorously in an up-and-down motion. The spring coil design is optimized for this vertical action. You can also incorporate small circular movements as you pump the whisk to create a whirlpool effect. Continue whisking for about 15-20 seconds initially.
Step 5: Achieve Desired Froth
As the milk begins to froth and expand, you’ll notice its volume increasing. Continue the up-and-down motion. If the foam starts to rise too much, you can slightly raise the whisk head, keeping it just below the surface of the developing foam. Continue until the milk has roughly doubled in volume and you’ve achieved your desired level of foaminess.
Step 6: Refine Your Foam
Once you’re satisfied with the froth, gently tap the bottom of the mug or saucepan on your countertop a few times. This action helps to break down any large, undesirable bubbles, resulting in a smoother, more uniform texture. Then, swirl the frothed milk gently to integrate the foam with the liquid milk below. This step is key for a consistent, creamy mouthfeel.
Tips for Elevating Your Hand-Frothed Milk
Even with a manual tool like a spring coil whisk, small adjustments can significantly improve your frothing results.
- Maintain Consistency: Keep your whisking motion steady and consistent. Erratic movements can lead to uneven foam or splashing. A smooth, rhythmic up-and-down action is generally most effective.
- Avoid Over-Frothing: While it might be tempting to whisk for a long time, over-frothing can create overly large, unstable bubbles that dissipate quickly. Stop once the milk has roughly doubled in volume and has a pleasant, foamy texture.
- The Swirl and Tap is Crucial: Don’t skip the step of tapping and swirling your frothed milk. This technique helps to “polish” the foam, breaking larger air pockets into smaller, more desirable microfoam-like bubbles, enhancing both texture and taste.
- Experiment with Milk Types: As mentioned, different milks yield varying results. Try different brands and types of milk (dairy and non-dairy) to discover which one gives you the best froth with your spring coil whisk. Barista-style plant milks are often formulated for superior frothing.
- Clean Immediately: Milk residue can be tough to clean once dried. Rinse your spring coil whisk immediately after use with warm, soapy water to maintain its performance and hygiene.
Spring Coil Whisk vs. Other Frothing Methods
While the spring coil whisk is a versatile and convenient tool, it’s helpful to understand how it compares to other frothing methods.
| Method | Foam Quality | Effort Required | Cost | Best For |
|---|---|---|---|---|
| Spring Coil Whisk | Good for basic froth, larger bubbles | Moderate | Low | Quick, simple froth in small quantities |
| Electric Handheld Frother | Fine, creamy froth; good volume | Low | Low-Moderate | Consistent, quick foam; portable |
| French Press | Decent volume, can create fine foam with technique | Moderate | Low-Moderate | Multi-purpose tool; good for larger batches |
| Espresso Machine Steam Wand | Velvety microfoam, ideal for latte art | High (skill-based) | High | Professional-quality drinks, latte art |
| Jar Shaking | Airy foam, can have larger bubbles | High | Very Low | No equipment needed, quick & simple |
The spring coil whisk provides a good balance of accessibility and effectiveness for those seeking a quick, no-fuss frothing solution without investing in specialized equipment. It’s an excellent entry point into the world of homemade foamy beverages.
> “The true art of home brewing lies in mastering the tools you have. A spring coil whisk might not be a barista’s secret weapon for microfoam, but in the right hands, it can transform your daily coffee into a delightful, frothy indulgence.” – Admin of Reviewmula.com, Kitchenware Technician
Conclusion
The journey to perfect milk froth doesn’t always require expensive machinery. Your humble spring coil whisk, with its smart design and simple mechanics, can be a surprisingly effective tool for creating a satisfying, creamy layer for your favorite drinks. By understanding its capabilities, preparing your milk correctly, and practicing a few key techniques, you can confidently transform ordinary milk into a delightful, frothy indulgence. Embrace the simplicity and enjoy the rich, textured beverages you can craft right in your kitchen. So, grab your spring coil whisk, heat that milk, and get ready to elevate your daily coffee ritual. What will be your first frothy creation?
Frequently Asked Questions
Can a spring coil whisk create latte art foam?
While a spring coil whisk can create froth, it generally produces larger, less delicate bubbles compared to the velvety microfoam required for intricate latte art. Achieving true latte art typically necessitates the fine, consistent foam made by a steam wand or high-quality electric frother.
How long does it take to froth milk with a spring coil whisk?
Frothing milk with a spring coil whisk usually takes between 1 to 2 minutes of vigorous whisking, depending on the amount of milk, its temperature, and your desired level of frothiness. You’ll see the milk expand and thicken as air is incorporated.
What’s the best milk for frothing manually?
Whole milk is generally considered the best for manual frothing due to its fat and protein content, which results in a creamy, stable foam. However, 2% milk also works well, and barista editions of plant-based milks like oat milk can also produce good results.
Do I need to heat the milk before frothing?
Yes, heating the milk is crucial for optimal frothing. The ideal temperature range is 140°F to 155°F (60°C to 68°C). This temperature allows the milk proteins to denature and stabilize the air bubbles, creating a sweeter, more stable foam. Cold milk can be frothed, but the results may be less stable and creamy.